I have a Yarvik Xenta 97ic tablet(TAB9-200) running Android Jelly Bean. Its specifications are very good for its money but there are a couple of things that I don’t like….
So I thought that it would be great if it could run any CM version as the updated versions of Android are always better in the terms of GUI and multitasking. I Googled if there were any ROMS available and I came across with a blog called Crewtablet(i think). I downloaded the ROM that in my opinion would fit better with my situation (as there wasn’t any ROM for my tablet). I flashed the ROM and then… BLACK SCREEN. So what’s next? The tablet seems connected on pc but doesn’t respond with any button combinations. I visited the site of Yarvik just to get the preinstalled stock ROM and reflash it but with no luck. They completely deleted all their support pages and threads for their previous models something that made me angrier. At least there is a cached version on web.archive.com. I found a link for the Jelly Bean image of this device and tried to flash it. Unfortunately, it was the wrong one…. Now my device had a black screen and also it couldn’t go back on the bootloader. Seriously!? (You see there are two images for the specific tablet and I picked the wrong one XD). Time for some googling. After a few minutes, I found out that these RK3066 based tablets have a small trick to completely debrick them. The only thing you have to do is to identify the NAND chip and find the TF-Boot pins and you’ll get into bootloader mode. So let’s start.
Locate TF-Boot pins
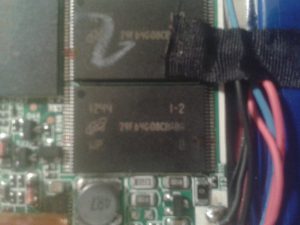
After removing the screws (two on the right side of the tablet) the back cover can easily pop out with a flat screwdriver. Now when we open it up we can see that there are two chips making our work more difficult.

As I came by in different threads (a lot of googling) I found out that the pins are more frequently the 8th and 9th. So I marked in both chips the 8 and 9 pin. Now the only method I could try was the test and failure (if it’s called like that). I desoldered the red wire of the battery from the PCB and pulled it up if it touches the PCB can toast the tablet. Find something metallic and connect those two pins. Then keep holding the Vol- insert the power cable and the USB cable press the Power button.
The Results
After a couple of retries, I found that the correct pins are the upper left ones and now my device is in bootloader mode.
Now run the flashing tool on pc and… Voila, you have a fully working device again!